Help & Documentation
Learn how to use WhenSwell to discover and track your favorite surf spots.
What makes WhenSwell different is that you define your own spots and exactly what conditions you like, not what others think. If you prefer side-shore winds and small swell for a little-known surf spot, WhenSwell alerts you to those precise conditions by highlighting matching forecast windows.
WhenSwell is currently in Beta
Your preferences, favourite spots, and boards are stored in your browser's local storage. Clearing your browser data or storage will remove these settings. You can back up all your data using the Export / Import page. Cloud storage of user settings is coming soon!
Filtering Surf Locations
WhenSwell provides powerful filtering options to help you find the perfect surf spot based on your preferences.

Screenshot showing the search box and filter dropdowns (Skill Level, Wave Direction, Swell Direction, Region, and Favourites button)
Search by Name or Description
Use the search box at the top of the locations list to find spots by name or description. The search is case-insensitive and matches partial words.
Filter by Skill Level
Filter locations by skill level: Beginner, Intermediate, Advanced, or Expert. Select "All" to see spots of all skill levels.
Filter by Wave Direction
Find spots that break Left, Right, or Both directions. This helps you find waves that match your stance preference.
Filter by Swell Direction
Filter by the direction from which swells approach: N, S, E, W, NW, NE, SW, or SE.
Filter by Region
Narrow down locations by geographic region: North America, Central America & Caribbean, South America, Europe, Africa, Asia, or Oceania & Pacific.
Show Favourites Only
Click the "Favourites" button to show only locations you've marked as favorites. Toggle it off to see all locations again.
Adding Custom Locations
Add your own surf spots that aren't in the default list. Custom locations appear alongside the main locations and include full forecast support.
How to Add a Custom Spot
- Click the "Add Custom Spot" button in the sidebar or on the main page
- Enter a name for your spot (e.g., "My Local Break")
- Click on the map to set the location coordinates, or manually enter latitude and longitude
- Click "Save" to add the spot
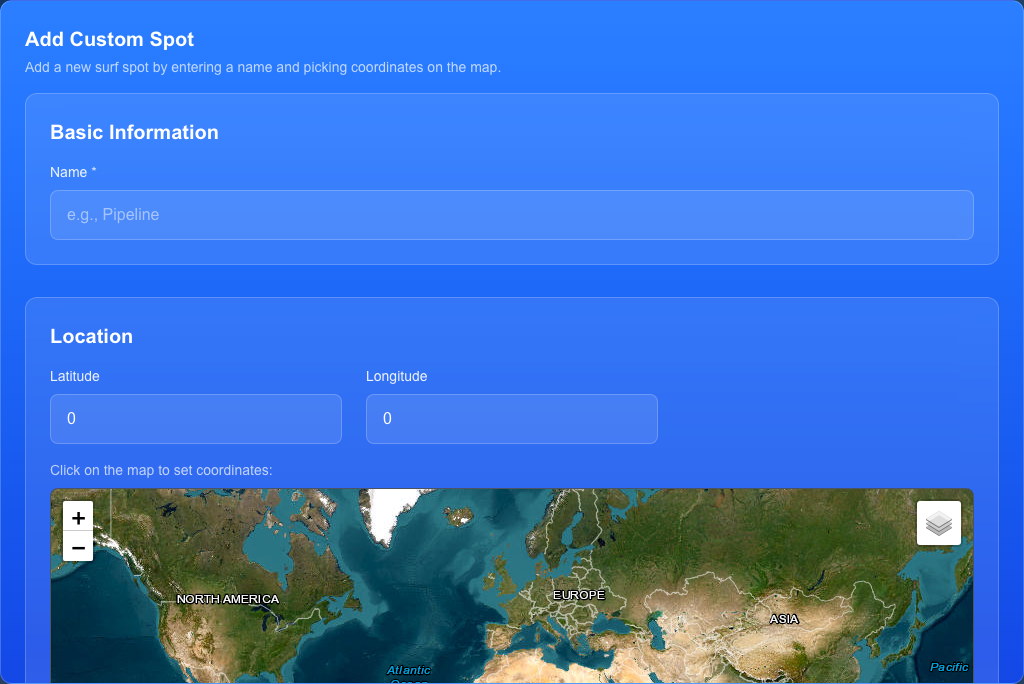
Screenshot of the custom spot modal showing the name input field and map for selecting coordinates
Managing Custom Spots
View all your custom spots on the My Custom Spots page. From there you can:
- Edit spot names and locations
- Delete spots you no longer need
- Import and export your custom spots as JSON files
- View forecasts for each custom spot
Preferred Settings for Locations
Set your ideal conditions for each surf spot. WhenSwell will highlight forecast hours that match your preferences, making it easier to spot the best times to surf.
How to Set Favourite Conditions
- Navigate to any surf location (custom or default)
- Scroll down to the forecast section
- Click the "Set Favourite Conditions" button
- Configure your preferences:
- Swell Height Range: Minimum and maximum swell height in meters
- Preferred Swell Direction: The direction from which swells should approach
- Minimum Swell Period: The minimum period (4-20 seconds) - longer periods mean more powerful waves
- Preferred Wind Directions: Select one or more wind directions (offshore winds create cleaner waves)
- Preferred Tide: High, Low, Incoming Mid, or Outgoing Mid
- Click "Save" to apply your preferences
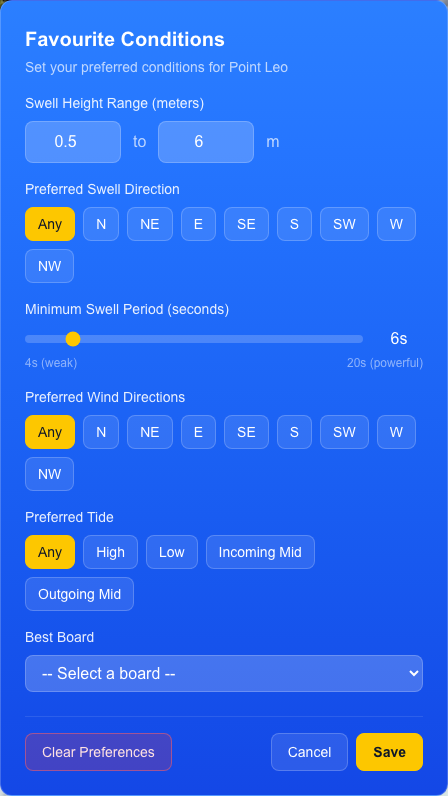
Screenshot of the Favourite Conditions modal showing all the preference options (swell height range, swell direction, period, wind directions, and tide preferences)
How Matching Works
Once you've set favourite conditions, forecast hours that match your preferences will be highlighted in the forecast display. This makes it easy to quickly identify the best times to surf at each spot.
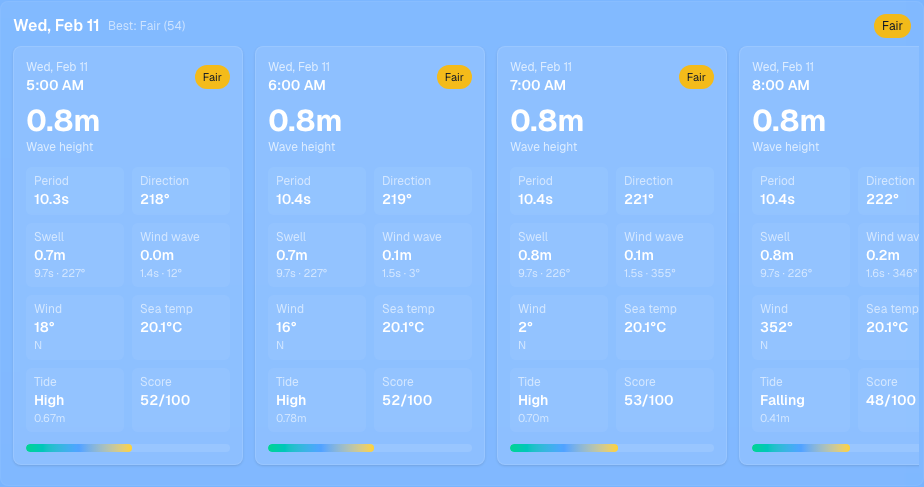
Screenshot showing a forecast display with matching hours highlighted (likely in yellow/gold) based on favourite conditions
Clearing Preferences
You can clear your favourite conditions for a spot at any time by clicking "Clear Preferences" in the Favourite Conditions modal. This removes the highlighting but doesn't affect the forecast display.
Adding Custom Boards
Keep track of your surfboard collection and match boards to your favorite spots.
How to Add a Board
- Click the "Add Board" button in the sidebar or on the main page
- Fill in the board details:
- Nickname: A friendly name (e.g., "My Daily Driver")
- Manufacturer: The board brand (e.g., "Channel Islands")
- Model: The board model (e.g., "Rocket 9")
- Size: Board dimensions (e.g., "6'2 x 19 1/4 x 2 1/2")
- Click "Add Board" to save
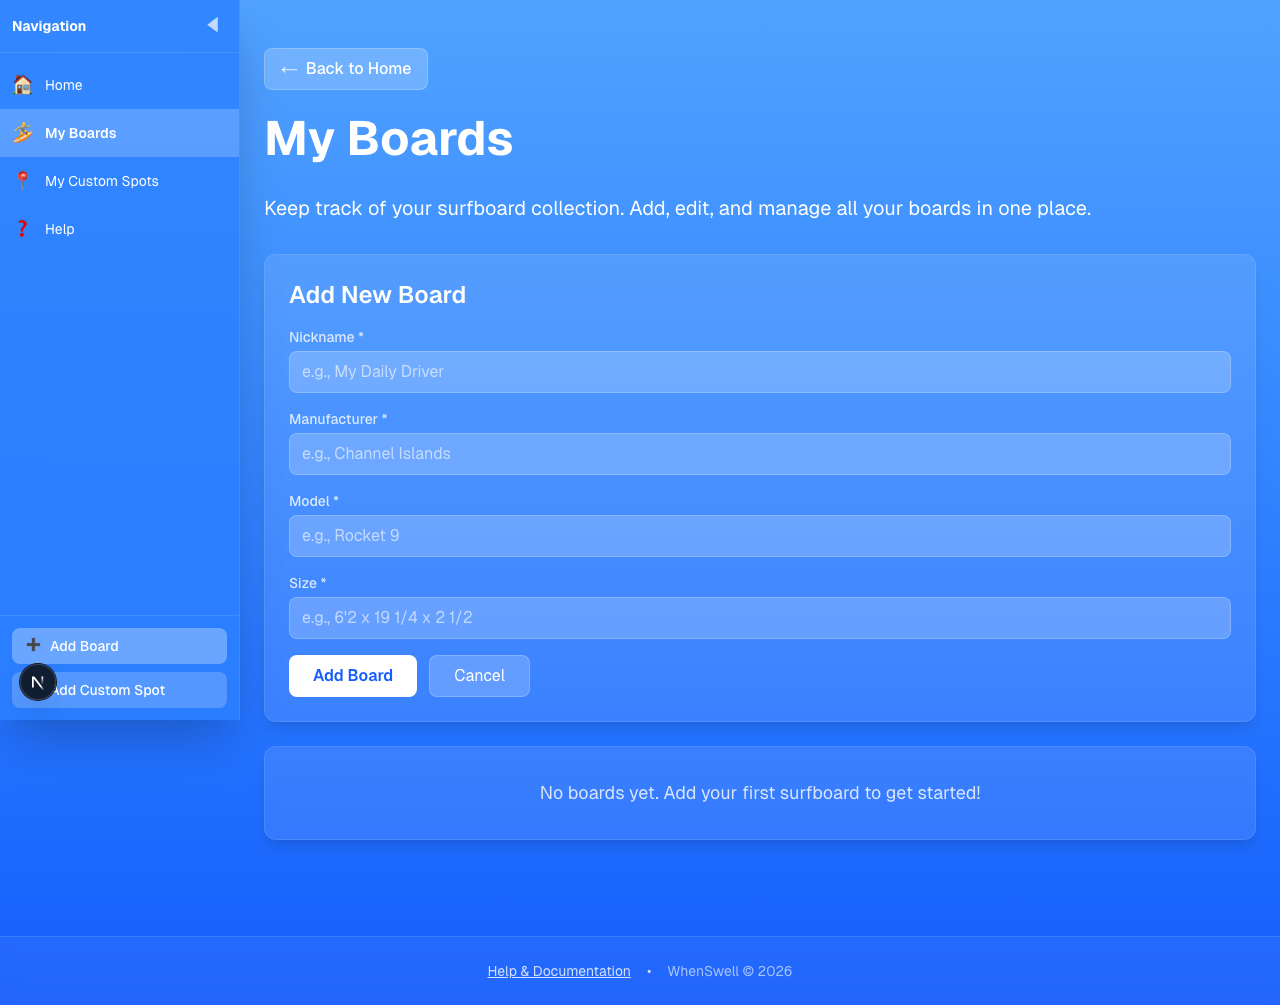
Screenshot showing the board form with fields for Nickname, Manufacturer, Model, and Size
Matching Boards to Spots
Once you've added boards, you can assign a "Best Board" to each surf location. This helps you remember which board works best at each spot. Look for the "Best Board" dropdown on each location card.
Screenshot showing a location card with the 'Best Board' dropdown selector visible
Managing Your Boards
View and manage all your boards on the My Boards page. You can edit or delete boards at any time.
Additional Tips
• Favourites: Click the star icon (☆) on any location to mark it as a favorite. Click again to remove it.
• World Map: Scroll down to see all locations plotted on an interactive world map.
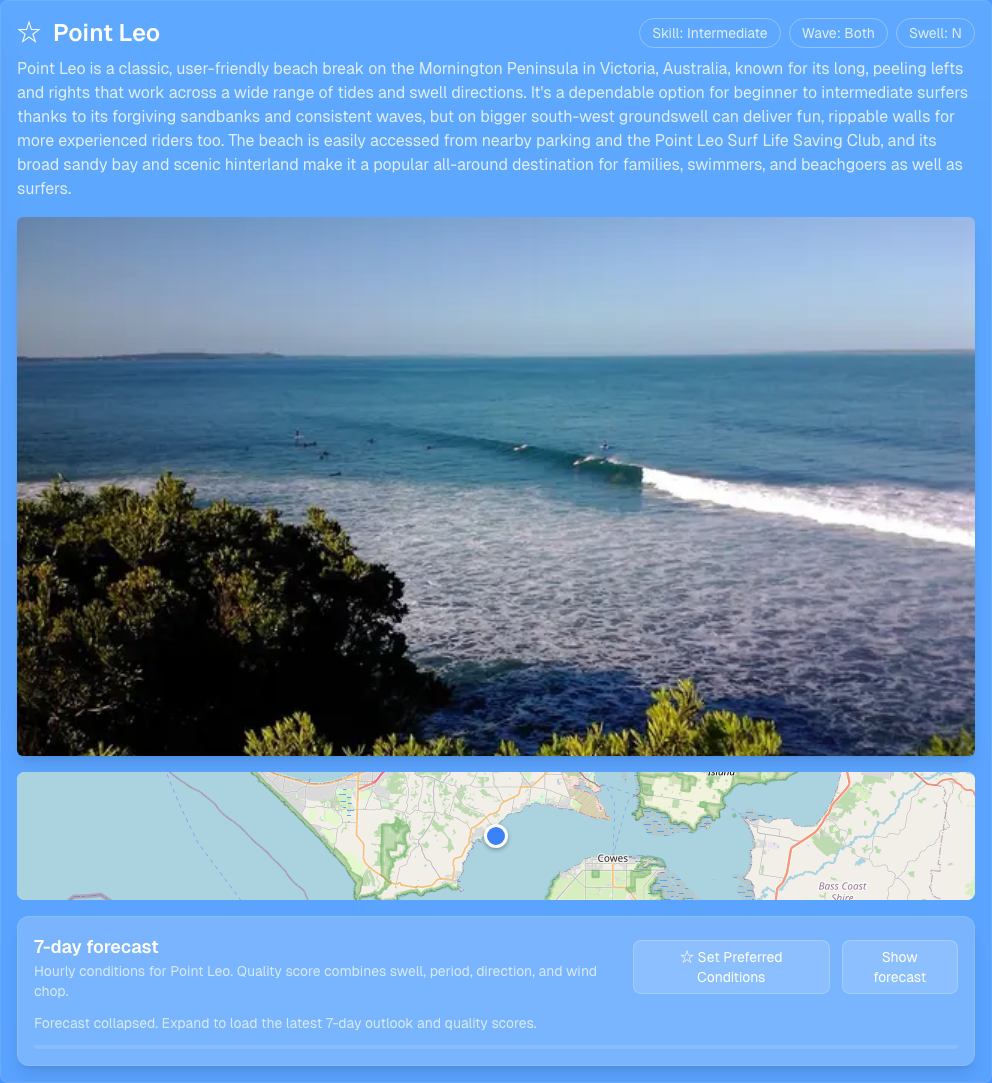
• Forecasts: Each location includes a detailed forecast showing swell height, period, wind conditions, and more for the next few days.
• Mobile Friendly: WhenSwell works great on mobile devices. Use the hamburger menu to access navigation on smaller screens.